
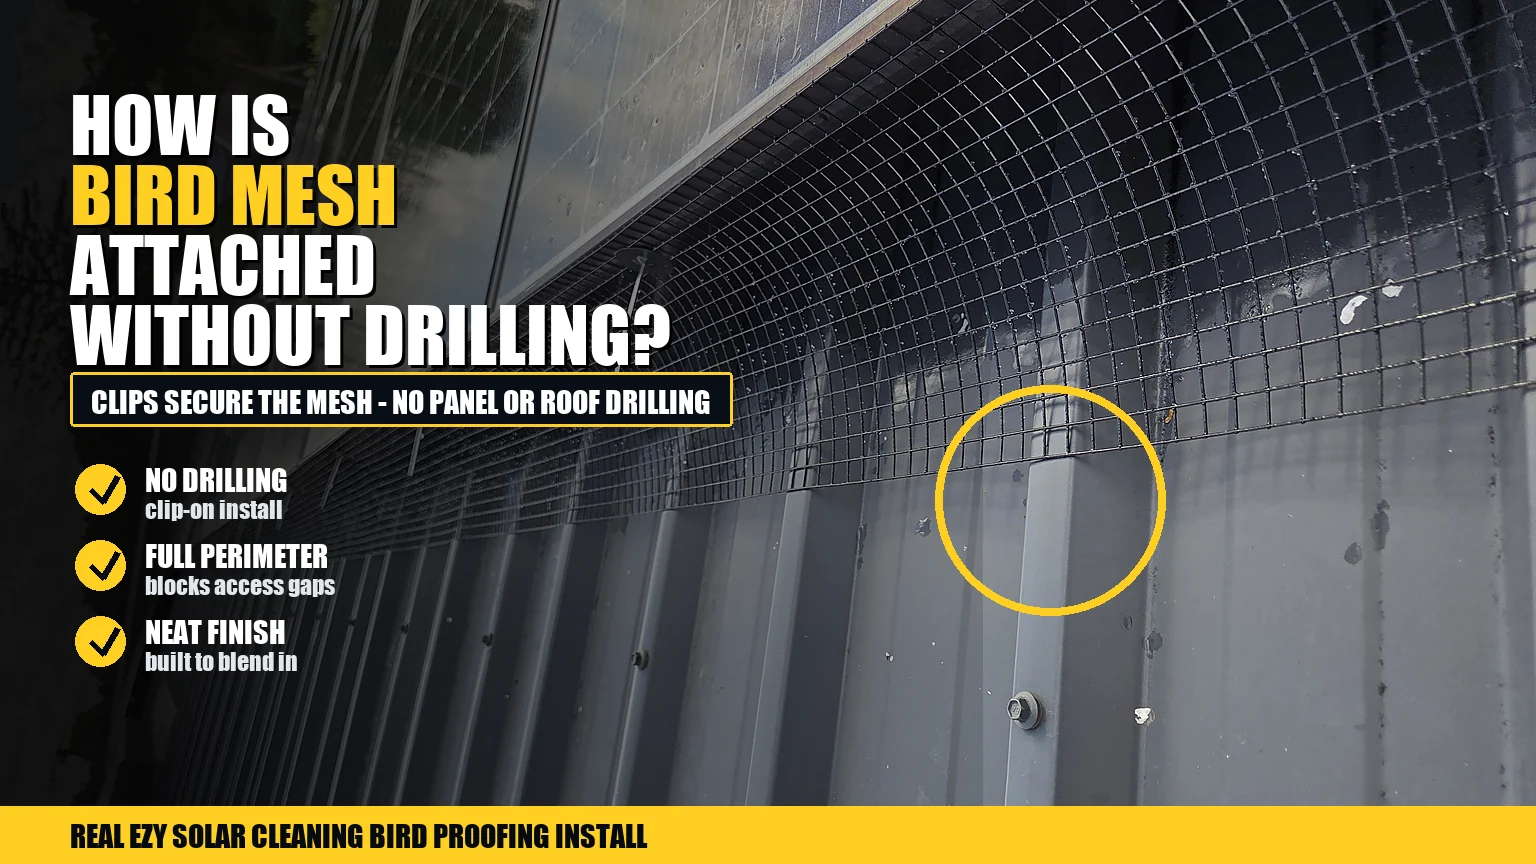
Bird mesh is normally attached to solar panels with purpose-made clips, not by drilling into the solar panels or the roof. The mesh sits around the outside edge of the solar array and is clipped to the panel frame to block pigeons from getting underneath.
This matters because homeowners are often worried that bird proofing will damage their solar system. A proper no-drill installation is designed to close the bird access gap while avoiding unnecessary interference with the panels, roof surface, and solar mounting system.
Why drilling should be avoided
Solar panels and roofs should not be treated like a general fixing surface. Drilling into panels can create obvious risks, and drilling into roof surfaces can create unnecessary problems. A professional installer should not need to drill into the panels or roof to attach bird mesh.
The correct approach is to use clips that secure the mesh to the panel frame. The exact clip choice can vary depending on the panel system, but the principle is the same: secure the barrier without damaging the solar array.
How the mesh sits around the panel edge
The mesh is shaped around the perimeter of the solar panels. It blocks the open gap underneath while still allowing airflow through the mesh openings. It is not a solid sheet, and it should not be stuffed under the panels.
Good solar panel bird proofing should look neat from the ground. The mesh should follow the panel edge, wrap around corners cleanly, and avoid large gaps or loose sections.
What happens at corners and difficult edges?
Corners are where workmanship matters. Pigeons only need one useful opening, so the installer needs to shape and clip the mesh carefully around corners, side edges, and any tricky sections near brackets or gutters.
Some systems also have gaps between panel rows or separate arrays on garages and extensions. A good installer checks every panel group rather than only protecting the most visible edge.
No-drill attachment compared with shortcuts
| Method | Why it matters |
|---|---|
| Solar panel clips | Designed to hold mesh to the panel frame without drilling |
| Drilling into panels | Should be avoided because it can damage the solar panel |
| Drilling into roof surfaces | Can create unnecessary roof risks |
| Silicone or glue | Not a reliable long-term fixing method for this job |
| Cable ties or improvised fixings | Can look untidy and fail in Brisbane rooftop conditions |
What material is used with the clips?
The mesh itself should be suitable for outdoor rooftop use. Brisbane heat and UV exposure can damage cheap plastic products, so quality mesh and suitable clips are important. Poor mesh can sag or break down, and poor clips can let otherwise decent mesh move out of place.
If you are comparing materials, read what mesh is best for solar panel bird proofing.
What if birds are already nesting?
If birds are already under the panels, attachment is only part of the job. Accessible nests and loose debris should be removed before the mesh is fitted. Otherwise, old material can be left under the array.
Where droppings have built up on the panel glass, solar panel cleaning may also be useful. Cleaning and bird proofing solve different parts of the problem: one removes contamination, the other blocks access.
How homeowners can check the result
From the ground, look for a neat line of mesh around the panels. It should not hang loose, bulge out, or leave obvious openings. The finish should blend with the solar panel edge rather than looking like chicken wire or a rushed DIY patch.
Do not climb onto the roof to inspect closely. If you are unsure, take safe ground-level photos or ask the installer to explain the perimeter coverage and clip method.
The bottom line
Bird mesh is attached without drilling by clipping it to the solar panel frame. A proper installation uses suitable mesh and clips, protects the full perimeter, avoids drilling into the panels or roof, and removes nesting material before sealing the space where needed.
FAQs
Is bird mesh screwed into the solar panels?
No. A proper installation should use clips rather than screws or drilling into the solar panels.
Does bird mesh damage the roof?
It should not when installed correctly. The mesh is attached to the panel frame, not drilled into the roof.
Can the mesh be removed later?
Yes, mesh can usually be removed if required for maintenance, though it should be handled carefully.
Will clips work on every panel?
Different panel systems may need different clip choices, which is why inspection and experience matter.
Does no-drill bird proofing still stop pigeons?
Yes, if the mesh is fitted properly around the full perimeter with no useful gaps left open.
Why no-drill attachment is better for future maintenance
No-drill mesh attachment also makes future maintenance simpler. If a solar technician or cleaner needs access later, clipped mesh is generally easier to understand and work around than improvised fixings, silicone, or material screwed into places it should not be.
This does not mean homeowners should remove the mesh themselves. It means the installation should be tidy and serviceable, so future roof or solar work is not made harder by a rushed bird proofing job.
What to ask the installer
Ask how the mesh will be clipped, whether any drilling is required, how corners will be handled, and whether all panel groups are included. Clear answers are a good sign. Vague answers about “just attaching mesh” are not enough when the work is happening around a solar system.